In this post, I'll walk you through how to craft a clear and structured Product Requirement Document (PRD) that's specifically designed to prompt AI agents effectively. When done right, this approach often results in fully functional UI layouts on the very first prompt.
The PRD we'll be using as our case study is for an internal Admin Dashboard I built for a project called Secret Santa Exchange. It's a tool that gives developers full control over gift exchange groups, user profiles, member assignments, and AI-generated gift suggestions.
As we go through each section of the document, I'll show you how I structured the requirements in a way that makes it easy for an AI agent to understand, reason about, and generate what you want.
1. Header of Your PRD Document
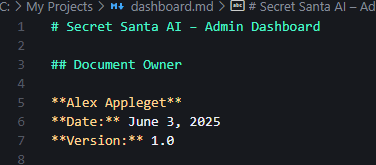
Start your PRD with a clear title that briefly describes the feature or product area (e.g., Secret Santa AI – Admin Dashboard). While the AI may not rely heavily on the title, it helps you and your team quickly identify the document's purpose.
Include these essential elements:
- Document Owner - so collaborators know who to contact for clarification
- Date Created - to track document age and relevancy
- Version Number - especially useful when iterating or collaborating across teams
2. Overview Section
Next up, let's dive into the most critical section of the document: Overview.

The overview provides a high-level summary of the product or feature you want the AI to build. This section sets the foundation for everything that follows. If the AI misunderstands this, it will likely get the rest wrong.
Write your overview as if you're explaining the product to a new team member. Be clear about:
- What the product is
- Who it's for
- What core functionality it needs to support
In my example, I included all relevant database tables up front. Why? Because this admin dashboard needs to read from and write to those tables. Giving the AI schema-level detail early helps it understand how the UI and logic should interact with the database.
💡 IMPORTANT:
Before moving on, review your overview carefully to ensure it clearly explains what you're building, why it matters, and which core elements, like key features, data models, or user roles, should be included. This section is critical because it frames the context the AI uses to generate accurate and relevant output. A vague or incomplete overview often leads to misaligned results, so take the time to get it right.
After writing the overview, the next section should break down each specific feature you want the AI to build. Think of this like writing a set of instructions per component or screen. If you're building a portfolio, this might include sections like the homepage, about page, or contact form, each with layout and behavior details. In my case, since I'm building an admin dashboard tied to a database, I describe each table and explain exactly what functionality I want the dashboard to provide for managing that data.

In the example above, I titled the section Database-Centric Feature Mapping because I was breaking down dashboard functionality based on database tables. You should name this section based on the organizing logic behind your features—whether it's Portfolio Sections, E-Commerce Pages, or something else entirely. The label itself doesn't directly influence the AI, but it helps you and your team stay organized when reviewing or expanding the document later.
Beneath your section title, create clear and well-structured subsections for each feature, database table, or page your product includes. This is arguably the most critical part of your PRD because it's where you translate your product vision into actionable, detailed instructions. The AI uses this section to understand functionality, structure, and interactions. So, the more precise and thorough you are here, the better your results will be. Missing or vague details often lead to misalignment and time-consuming reprompting. In my example above, I included just one subsection, since the others follow a similar pattern with slight variations in how I want each part to function.
I name each subsection after the corresponding database table to help the AI map the functionality to the underlying data structure. Alongside that, I include a more human-readable name, usually the label I want displayed in the dashboard’s sidebar tab, so the AI understands both the technical and user-facing contexts. Below the title, I add a brief description that acts like a mini-overview, summarizing the purpose of that section. I then describe the specific dashboard features I want for interacting with that table, such as: viewing entries, filtering, editing, or bulk actions. Finally, I include example user actions or workflows to ground the AI's understanding in real-world usage. These examples help align the output more closely with how the section should function in practice.
3. UI/UX Design

Now that the features and functionality are clearly defined, it's time to guide the AI on how those features should look and feel. This section covers the UI/UX Design, starting with the global layout of the admin dashboard. Here, I define the core navigation structure, mapping each sidebar item to its corresponding data source. This ensures the AI aligns the interface with the backend logic we previously described. After that, I walk through specific views (starting with the Users section) as an example of how each page should be structured and what interactions should be available to the user.
4. Tech Stack

Lastly, I include a section specifying the tech stack I want the AI to use, such as React with TypeScript, Tailwind CSS, or any relevant libraries or frameworks. This ensures the generated code is compatible with my existing codebase and follows the conventions I'm already using. It also helps the AI choose the right syntax, tooling, and architecture patterns from the start, reducing the need for refactoring later.
Putting It All Together
With your PRD complete, you're ready for the fun part: seeing what the AI can build. I personally use Vercel's v0 AI, but you can use any capable model that accepts document inputs. Simply start a new chat, drag and drop your PRD file into the chat bar, and hit enter. The AI will take a moment to analyze your document and begin generating a fully-formed UI based on your specs. No reprompting was needed in my case. Just my well-structured PRD document. Below, you'll find a video showing exactly how I uploaded my file, and another showing the result the AI returned.